5 Useful Tips for Hair Maintenance

Hair is an essential accessory for most and it therefore makes sense to maintain it to the best of your ability. With the proper attention that doesn't cause stress or harm it is possible to enjoy the light, flowing hair that gives the look and shine that you want. Here are five tips for your general hair maintenance routine:

Use conditioner wisely


Unless you have an issue with a very dry scalp, there is generally no need to apply a conditioner to the full head of hair. Applying too much conditioner can leave the hair looking quite greasy, especially when you consider the scalp is able to naturally produce oil on a daily basis. The preferred treatment is to focus on the ends and put conditioner on the last three-quarters of your hair.


Bobby pins


To stop the bobby pins sliding out it can benefit to give them a light spray of hairspray or similar. This has the desired effect of providing extra grip so it is no longer necessary to be concerned about them falling out and having a negative impact on the hair style. Make sure to leave the pins for several minutes to dry after spraying. This simple tip is most effective on thin, straight or fine hair.

Silk pillows


Switching the pillow case to satin or silk can have plenty of benefits. By replacing the cotton pillow it is not only possible to benefit the hair but also your skin. A cotton pillow can cause split ends or similar hair breakage, as well as removing moisture from the skin. Other benefits of switching to satin or silk are the more luxurious feel, healthier eyelashes and smoother skin.

Massage the scalp


Giving the scalp a massage every morning when having a shower can do wonders for the hair. It not only helps to improve the strength of the roots, but also helps to stimulate hair growth. The scalp massage helps to increase the blood flow to this area of the body which is beneficial for improving circulation, reducing stress and even putting you in a better mood.

Wide-tooth comb


A wide-tooth comb is a lot friendlier to the hair to brush out tangles from wet hair compared to the traditional paddle brush. This type of comb is less likely to pull and tug on the hair like a brush. This means it is easier and safer to remove the tangles while causing minimal damage. For more convenience it can benefit to use a wide-tooth comb while still in the shower. Also, for the more stubborn tangles, try to comb those out while the conditioner is still in the hair.

How To Choose A Natural Foundation And Have A Beautiful And Delicate Skin

When using an organic makeup, you're sure putting on your skin only natural products and high biological value, rich in vitamins, minerals, oils and polysaccharides, etc., and these products are free of pesticides, hormones, preservatives, parabens and chemicals and genetically modified. To have a gentle and beautiful skin, you need to choose the organic makeup brands and the best natural foundation that you'll use.

The best natural foundation in addition to meeting the primary objective of the makeup, which is prettify, create an aesthetic effect, using makeup you are also taking care of the health of your skin, adding nutritional and antioxidant properties directly from nature, it may be a great choice, too, for people with allergies and sensitivity. Your skin will feel the difference.

To differentiate a common product of an organic makeup, read labels. There are also some elements which may be natural or chemicals such as moisturizers and preservatives. We should also pay attention to this particular point.

Try to use organic makeup because it is much more beneficial than the other, and does not cause damage to your health. For example, the natural foundation takes care the epidermis and returns it to its natural conditions, and especially vitality. This is due to the action of natural ingredients directly into the skin tissue without the interference of other synthetic components that can sometimes present irritative potential.

When choosing a natural foundation, check what it offers: mineral products or if it is hypoallergenic, for example. The ingredients should be pure and contain organic assets.

The best natural foundation should have an ultrafine texture that adheres well to the skin, the finish must be a middle ground between the natural and the matte color, without let the shining face, but can't let the fully opaque face

So, for you can benefit from this type of makeup, you need to find a reliable makeup brand. Note some of its benefits.

1. The organic makeup should be free of parabens


The parabens are synthetic chemicals used as preservatives in food, medicines, beauty products and makeup. The advantage of reliable organic makeup brands is to be free of this component which can cause allergies, premature aging of skin cells and cancer.

2. The organic makeup does not degrade the environment


As the production of this type of product does not use chemicals in their culture and attempts to minimize the maximum damage to the environment, to maintain the "organic" label, it is less aggressive to the environment. In an attempt to become us more aware and civilized for the sake of the planet and personal development, we do well to acquire it.

3. Organic Makeup is good for sensitive skin


Sensitive skin types do not suffer from the makeup for not having enough chemicals to cause allergies or irritations. The oil, very common among non-organic makeup products are responsible for clogging the pores, pimples and kidney cancer and liver.

4. Organic Makeup provides greater functionality to the product


As the organic makeup does not have chemical agents that damage both the skin, it ultimately benefits not only the superficial beauty, but also the natural beauty of the skin.

Now that you know all the benefits of this type of makeup, you can feel more peaceful when choosing the best natural foundation and have a gentle and natural skin.

Celebrity Inspired Haircuts To Rock This Summer

We all want to look stylish and feel star like. Most of us follow our favorite stars religiously and try to look like them on some occasions. When we have to decide what to wear to a wedding or a big event we turn to them for fashion advice and go though their past appearances to decide an outfit or just get the exact same thing.

As we already are into following their clothing and jewelry style, here are the most stylish haircuts and not hairstyles flaunted by Bollywood and Hollywood celebrities that we can easily make do with this summer. Get these haircuts and add silver jewelry like earrings to look more glamorous.


1. Blunt Chop: If you have wavy hair, this is the best option. As Charliez Theron flaunted this look with a jaw length, shaggy and wavy combo this summer. This adds bounce to your hair, you can keep it open without feeling hot and just flaunt around as they add character to your hair. You can choose between jaw length and shoulder length according to your preference.


2. Shaggy Fringe: If you follow Taylor Swift you have definitely aware of this look. She flaunted a shaggy fringe at The Met Gala this summer with bob length hair. It's a cool, versatile look and accompanies sexy outfits. Add silver jewellery like earrings and just complete the look.


3. Go Bob: Right now shaggy hairstyles are in trend but if you want a sleek look go for a sleek bob with shark ends that shape your face. Priyanka Chopra however flaunted an entirely different style when her shaggy bob had different lengths on both side for a dramatic effect. You can choose to do that or just get a basic bob and add highlights or streaks. Even curls look good in a bob cut. Buy silver jewellery online like studs and add them to complete the look.


4. Keep it Long: If you like the length of your hair and do not want to cut them down. Then this is what you can do, just go the Deepika Padukone way and streak them. Long hair and streaks go perfect together. You can go blonde, brunette, red or anything you want when it comes to the color of the streaks. Long hair looks perfect with traditional silver jewelry like chand balis or maang tika as well.


5. Pixie Cut: This is the perfect boho hair cut, with your cut short and ends a bit spiked. Everyone from Emma Watson, Halle Berry, Gul Panag are flaunting this look. It keeps the focus on your face and can be done with added bangs or fringes. It is sexy and edgy and if you need a good look change just go for it.


6. Short And Curly: Get the sporty look of Kangana Ranaut as you flaunt your curly hair in a bob or shoulder length style. It looks great with your natural curls and goes with any outfit. Buy silver jewellery online and adorn your hair with elaborate maang tikas and earrings.


7. Keep it long but bang it: Get your long hair layered starting at the chin with them being angled outward. The side- swept band is the ultimate look with layers, you can decide its length if you want to go short or long enough for it sit behind you ear. This look is Aishwarya Rai Bachchan's go to look for most of the occasions. You can add streaks or highlights to it to accentuate the look and flaunt those long layers with your ethnic attire or even a western.


Hair Highlighting Options

Highlights are modern hair trends and they can either be partial or full. The partial highlights seem to be more popular among women because they set in very naturally and create unique looks. It is advisable that you have an experienced and talented colorist do your highlights because they are better placed to interconnect, weave and blend the patterns for a natural looking highlight finish. However, a good number of women still prefer to do their own highlights at home and with the right guidelines, the results can be just as pleasant.

Foils and caps are used during coloring and even though most colorists love using foils, caps seem to be better for medium and short hair lengths. Because highlights can be expensive, you can alternate between full and partial highlights. They can be difficult to use on naturally wavy or curly long hair strands. Different techniques are used when highlighting the hair and the yield different results.

Lowlights


They are achieved by interweaving darker contrasting colors with highlights against the base so that movement and depth is created. You can have the roots painted with a color that is slightly darker for root shading.


Color quilts


The highlighting technique uses custom lowlight and highlight designs and different colors to form triangular quilt patterns or clocks on the upper part of pre colored base. The quilt pattern brings out very unique results, but it is hard to recreate when it grows out.


Baliage


The hair highlighting types revolves around free form hair painting. The highlights are done with foils but plastic wraps are sometimes used to keep bleached sections separate so bleeding to the rest of the hair is minimized. It is artistic requiring a hair colorist and offer most natural highlight look.


Color cascading


This hair highlighting technique involves color application in varying grades and the colors are fused from the hair roots to the tips. It adds dimension to lowlights and highlights, giving a beautiful look.


Chunking


Back in the days this technique created big highlight chunks lightened with one color. It has since evolved and now you can alternate up to three colors into your chunky highlights and spread them out over the head as desired. Colorists today use this technique with the intention of avoiding over bleached hair effect and so the results remain very natural looking.

When choosing highlights, it is very important to choose color patterns that will give a natural but unique look. However, contrasting lowlights and highlights are just as interesting and pleasant. Blondes can be creative with bright color highlights like blue, pink and purple whereas brunettes can go get deep reds to achieve beautiful highlights. Highlights create instant beautiful contrasts on varying hair color bases and they can brighten skin tones when woven around your face. You can use the highlights to cover silver, gray and white strands or to add a tasty new color without necessarily going full head with the color. It is a way of complementing hair textures too.

Partial hair highlights are very beautiful and versatile too. You can have a look at http://hairstylezz.com/best-partial-highlights/ for stunning partial highlight ideas you will love to sport.


Learn to Apply Eye Makeup by Browsing Blogs - Plus, Use These Tips!

By learning the various techniques from makeup bloggers, applying eye makeup will be simple. There are likely many tips and tricks that even the most experienced wearer can benefit from learning.

Choose the Right Eye Shadow Colors


Eye Shadow Colors
Usually, one will wear three different shades in one. They are a medium, dark and light shade that all go in different areas. Medium goes on the lid, light on the top, and the dark in the crease of the eyelid. Colors should be chosen from the same family, such as blues and browns.
A great tip from makeup bloggers is to use shades of eye shadow that go with the eye color of the wearer to enhance them.

· Blue eyes are great with similar shades to include grey, silver, and dark blues. Bronze, copper, brown and tape are also beautiful with blue eyes.
· Brown eyes benefit from bronze, tape and brown, but also look lovely with purple, grey, blue and green.
· Green eyes can also wear similar shades to include all shades of green; pink, purple, gold and taupe also look great.
· Those with grey eyes will do well wearing charcoal, silver and blue with contrasting shades being brown, green, purple and gold.
· Hazel eyed beauties are lucky as they can use almost any color. Most go for golds and greens to bring out those elements of the eye color, but purple, wine and brown look great too.
· Eye shadow primer will make the shadow last longer.

Base and Highlights

Here are the steps to follow as advised by the top makeup bloggers worldwide:

1. Starting with the lightest shade, swirl the shadow brush in the makeup and sweep it over the eyelid.
2. Gently blend the shadow to the corner of the eye, away from it.
3. Brush some loose powder underneath the eye right below the lashes to pick up any loose specks.
4. Use a primer to stop the shadow from creasing if desired.
5. Apply the highlight in the inside corners to have an eye-opening effect and define the eyes.

Apply the eyeliner


Apply the eyeliner
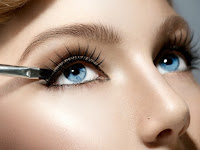
When applying eyeliner, makeup bloggers recommend putting the tip of the liner pen or pencil as near as possible to the lash line on the upper eyelid. Then slowly drawing a smooth line from the middle to the outside corner makes for a perfect start.
From there, one can extend the eyeliner a bit outside that corner, and make what's called a wing tip. A pencil or liquid eyeliner will do, it's purely a matter of choice. Most use brown for daytime and black for night ventures.


Applying Mascara


Applying Mascara
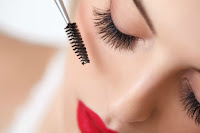
Makeup bloggers advise to begin applying mascara from the middle of the eye. The brush should be dipped just once and dragged along the rim to get rid of extra mascara. If the eyelids are lowered as the mascara brush is applied and moved side to side it will apply it perfectly. Some use mascara on their lower lashes while some do not.


Shade the Eyebrows


Not many have thick brows, so many will fill them in. Take an eyebrow pencil or some shadow and go along the natural shape of the eyebrows. Apply less the closer it gets to the nose, and use a color that's a bit lighter than the hair color. For blondes, go a few shades darker.

Natascha Cox is a well-known beauty professional in the UK. Her blog advises on many current beauty, fashion and travel trends and is followed by many women and men of all ages, worldwide. With many followers on her blog, Twitter, Facebook, Instagram and many other social media outlets, it's no secret that she's quick becoming the authority for those who want to make a lasting impression. She reviews products of all kinds, and many seek her out to review their items and give an honest review that's useful to all. To learn more, please visit http://www.nataschacox.com/category/beauty/


5 Tips to Aid in Daily Living

As we age, we often encounter a variety of health issues or ailments that can slow us down. And, while some of these ailments may be minor, inevitably they cause us to make adjustments to our standard of living. For some of us, it may be no more than a change in lifestyle or habits. However, for many people it means learning how to use an assortment of aids for daily living.


These aids for daily living can take many different forms. For some it can be as simple as re-arranging furniture so limbs are not bruised or perhaps changing ones diet and exercise routine to help improve bone and muscles strength, while for others it may involve adding safety features such as support bars or benches for the tub. In more extreme cases, it may mean moving to a new residence or either bringing outside help, but regardless of the actions, these ease of living actions typically mean a richer life than expected.

However, the aids for living life to its fullest are not always about new residences, or adding numerous safety features to the home (though these are great recourses to take!) but they may also be accomplished in the way things are communicated. Here are some important factors when thinking about ways that independent living can be more easily achieved.

· If at any time your treatment doesn't seem to be working, let your healthcare professional know, so they can reassess things. For instance, if the new diet is making you feel worse, or the medicine schedule is too complicated or having adverse effects, don't suffer in silence - speak up.

· Before embarking on a new exercise or diet plan, talk to your healthcare provider.

· Look for items that make life a bit easier. There is no shame in using a tool designed to keep you from injuring yourself.

· Do you need to lose a few pounds? Then endeavor to do so. Your doctor will be thrilled, and you will feel so much better. And who knows, you might even discover a new activity that makes you smile!

· Do you smoke? Then ask for help to quit. There are so many great products out there to make this easier than before.

Whether it be through items such as non -slip flooring, specialty tools, or through intentional conversations with your healthcare providers it is vital that you take advantage of as many aids for daily living as possible. After all, you want your "golden years" to enjoyable - not an increasing number of doctor's visits. However should you need items to assist you in being more independent, check out the items available through AbleMart - and get ready to remain a part of the great adventure of living life to its fullest.

Many websites provide additional information on the topic of aids for healthy living. One such site worth visiting is https://www.ablemart.com/

Janet Slagell independently authors articles for WebDrafter, Inc. for search engine marketing. The views and opinions expressed in this article are those solely of the author, and not of any other person, company or organization. No guarantee or warranty, express or implied, is made regarding the accuracy, fitness, or use of the content herein.


How to Ready the Face for Makeup Application the Proper Way

Before adding colors and all, it's important to ready the face for application. This involves cleaning, moisturizer, primer, concealed, foundation and powder to name a few products. Applying these takes a bit of knowledge which is why tutorials are awesome, but here are some basic instructions to get going.


Applying Foundation


There are many ways foundation can be applied and coverage is dependent upon what the foundation is applied with. Makeup tutorials will tell their audience that beauty blenders are the best, though foundation brushes and sponges work well too. Many just use their fingers.
Start at the nose, and work out on the bridge of the nose, chin and cheeks. Blend outwardly and don't forget the jaw line, neck and forehead or there will be a visible line that is more than unattractive.

Clean the Face


Wash the face with a gentle cleanser, then pat dry (don't rub) with a clean towel. There are many exfoliation cleansers that contain micro-beads that will buff the skin and leave it smooth and ready for makeup application. Many will wipe the face with a cotton ball that's been dipped in toner, this makes pores appears smaller.


Apply a Good Moisturizer


When it comes to choosing a moisturizer, one will quickly find there are more options than they imagined. Choose one that is good for the skin type and with no unnatural additives. There is oily, dry and combination types for the various skin conditions. Apply it gently in a circular motion, all over the face.

Some prefer tinted moisturizer that cover the use of both lotion and primer, or foundation. This option gives the face a lighter feel.

Use Primer and/or Concealer


Not everyone uses primer, but makeup tutorials say it gives a smooth and perfect finish if the wearer has very deep pores. Primers also help keep makeup on the skin longer. They come in different types, some cut redness and others are a matte finish.

Concealer is perfect for hiding any blemishes, discolorations and also the under-eye circles that many have. It should match the chosen foundation but be a shade or two lighter. It should also be gently applied in a circular, tapping motion. Makeup tutorials recommend using applicator or a brush so one isn't tempted to rub the skin. Cover blemishes, and those dreaded under-eye circles. Quickly patting powder over concealer keeps it from cracking or wrinkling.

· For pimples - use a green tint
· For dark circles - use yellow or orange tint
· For yellow skin tones, choose a lilac colored concealer

Match the Skin Tone


It's best so shop for foundation that offers samples, and by placing a spot of the makeup near the jaw line one can tell if they have gotten the best match. There are companies that sell foundations to go with warm, neutral and cool undertones. For anyone who is purchasing a foundation from one of these companies, be sure that the right undertone and skin tone is chosen.

Makeup tutorials advise of these tips to help decide the undertone:

· Those who have purple or blue veins have a cool undertone.

· Those who have greenish veins have a warm undertone.

· If it's hard to decide, then it's likely a neutral undertone.

Apply a Light Powder


Makeup tutorials advise choosing a powder that matches the skin tone. The powder brush should be swirled in it and any extra powder should be blown off. Begin at the nose, then forehead and cheeks. Powder helps set the foundation and give a finished look.


Natascha Cox is a well-known beauty professional in the UK. Her blog advises on many current beauty, fashion and travel trends and is followed by many women and men of all ages, worldwide. With many followers on her blog, Twitter, Facebook, Instagram and many other social media outlets, it's no secret that she's quick becoming the authority for those who want to make a lasting impression. She reviews products of all kinds, and many seek her out to review their items and give an honest review that's useful to all. To learn more, please visit; http://www.nataschacox.com/category/beauty/


All You Need To Know About The Tummy Tuck

The tummy tuck is a cosmetic surgery that involves elimination of excess fat and hanging skin from the central and lower parts of your abdomen. The procedure is also known as abdominoplasty. It is a major surgery that lasts for about five hours. A patient is put under general anaesthesia during the procedure. Even though the patient ends up with a firmer and flatter tummy, the surgery is not considered to be a weight loss procedure.

The complexity of the surgery depends on the case being worked on. Surgery on a person with a lot of excess fat in the abdomen is more complicated. After the administration of anaesthesia, two incisions are made by the surgeon on the abdomen. One incision loosens the navel area while the other incision raises the navel from the tissues. The skin is then lifted to expose the muscles in the abdomen.

The surgeon then stitches the muscles into a new position thus giving the patient a new and defined waistline. The skin is stretched back to its original position. Any excess skin is trimmed down and the tummy is stitched to close up the incisions. Lastly, the surgeon creates a new naval since the old one would be stretched far down the tummy.

You will remain with a scar on the tummy but most surgeons try their best to conceal it. The scar takes about six to nine months to disappear completely.

For the first couple of weeks, your tummy will be swollen and quite painful. The surgeon will prescribe some pain relieving drugs for you. It may take you two to four weeks to fully recover and get back to your normal routine. You may need to stay in hospital for a day or two so that the surgeon can see how you are fairing on.

Those intending to go through the surgery should be in good health condition. For example, obese people are advised to try and lose weight first before the surgery can be performed on them. This is to reduce the occurrence of complications like respiratory problems, infections, development of a blood clot and slowing down of the healing process. A woman who is planning to become pregnant is advised to have the baby first before undergoing the surgery.

The abdominoplasty type of surgery includes different types of operations. The price ranges from one type of surgery to another. A low costing procedure is also ideal but the higher priced procedures are higher in quality. Talking to a surgeon before the procedure is recommended because you will get to know of the risks involved, the price and the recovery process. It is also advisable to go through some before and after pictures of tummy tucks to get an idea of what to expect after the surgery.

If you decide to undergo the surgery, go for a qualified surgeon to perform it. This will help you reduce the health risks that come with cosmetic surgery. The qualified surgeon will also check up on you during the recovery period and advise you accordingly.

Dr Tavakoli is always glad when patients achieve the surgery goals they desire. Through his expert skill, he will help you achieve you surgery goals. You can make an appointment at Plastic Surgery Sydney. Kindly visit Dr Tavakoli webpage for more details.

Easy Remedies To Remove Skin Tan

During summers, we love going out in the sun, wearing our shorts and skirts and tank tops. It's fun and bright, with a lot of beach time.

But, one thing we absolutely hate is that tanning that follows after. The skin gets an unwanted dark shade and looks dirty for no reason; it's irritating and just does not look good. You don't want a tanned face when you flaunt your fashion earrings.

Apart from remedies like milk, rose-water and aloe vera, here are some extremely easy to do, home-made remedies that are a great solution to our tanning problems:

1. Yogurt and Turmeric Mask


What you need in this is to add a pinch of turmeric (haldi) to a bowl of yogurt. Mix it well and then apply it on the tanned area like face, neck, arms, legs etc. leave it for 20 min and then take a cold shower.

Do it regularly for two weeks as yogurt is found to provide glow to your skin and turmeric will help lighten the shade.


2. Lemon Juice


All you need to do is mix lemon juice with warm water and soak your hands in it for about 20 min. you can do this in a bucket to soak your feet or a bathtub to soak your entire body. Then just wash off with cold water

You need to do this for about two weeks, two or three times every week. Lemon will help lighten your skin with the help of Vitamin C and protect your skin cells. Don't forget to moisturize after as lemon will make your skin very dry.


3. Cucumber


To use this, make a paste by mixing cucumber juice, lemon juice and a pinch of turmeric. Apply the paste for about half an hour and the take a cold shower

Do this for two weeks as cucumber will cool down your skin and remove the tan.


4. Almonds


What you need to do is soak a few almonds overnight, blitz them up with some milk. Apply it as a paste, if possible let in sit overnight or just wash off with cold water in half an hour.

Do it regularly to two weeks and then reduce the usage to about twice a week. Almond will provide the much-needed anti-oxidants to your skin and milk will lighten it.

5. Honey And Lemon Juice


This make a cream by mixing honey, milk powder, lemon juice and almond oil. Apply it for about 20 min and then wash off with cold water. The best thing is that you can store this cream for about a week.

If you want super fast results, apply it thrice a day for a whole week.

Honey has amazing properties that helps boost up the skin, lemon juice lightens it and milk powder and almond oil provide nourishment to it.

6. Sandalwood


Make a thick paste my mixing sandalwood powder, turmeric and rose-water. This paste should be applied for 30 min before washing with cold water.

Do this twice a week and for better results try it before going to bed.

Sandalwood will heal all your sunburns and improve the complexion darkened by the tan.

7. Exfoliation


If you don't want to go through all the pain of making pastes and mixtures, just buy a good quality scrub that suits your skin. We know that you are anxious for your skin to look the same so that you can wear your fashion earrings again.

So, just buy a scrub with preferably some of the materials mentioned above in it. Exfoliate twice or thrice a week and do not forget to moisturize after that.

Once you are done getting your glow back, buy fashion earrings and other jewellery at VogueCrafts.com

Back To Basics - Aftercare Of Your Manicure And Pedicure

Manicure And Pedicure
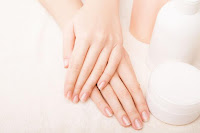
Every woman likes to look and feel her best. Beautifully manicured fingernails and pedicured toenails are essential for a really polished look. If you're looking at your hands and feet now and feeling a little self conscious that they are not looking their best, treat yourself to a manicure and pedicure. If you are unable to do it yourself, visit one of the many professionals out there who offer this service. It's only a little thing, but I know I feel a lot more confident when I have nice nails, even if my hair is a mess and I have no make up on. So once you've prettied up your nails, how can you maintain the way they look for as long as possible? There are some simple things you can do which will help to care for your hands and feet. I'm sure many of you already know most of them, but it can't help to have a quick refresh and go back to basics...

Avoid damage - Bitten nails are never a good look. If you are a nail biter, invest in one of the many products available to help you break the habit. Avoid using your nails as 'tools' where possible, use the pads of your fingers instead. When filing your nails, file in one direction only and avoid using metal files. Filing back and forth generates heat which can make your nails brittle and weakened. If you buff your nails to reduce ridges, only do so for a few seconds and never more than once a week. When cutting your toenails, always cut straight across, never at an angle as this can cause an ingrown nail - I can tell you from experience, they are painful!


Diet
Diet 
Diet - When you are ill, depleted of nutrients or run down, your hair and nails are often one of the first places where your body will show signs of damage. Drink plenty of water and eat a healthy, balanced diet with a good variety of vitamins and minerals.


Drying time - Pretty obvious but make sure you allow enough time for your nail colour to harden and set. If I need to speed up the time it takes for my nails to dry, I find dunking my hands in really cold water helps. It won't dry your nails completely but it will help to set them a little bit quicker.

Moisturise - It amazes me how many women take care of their face by moisturising and exfoliating regularly and yet completely ignore their hands. Even if you take great care of your face and neck, if you have wrinkled 'old lady' hands, it will be a real giveaway as to your true age as you get older. Look after your hands by using hand cream on a daily basis, especially after you have washed them as soap can have a drying affect on skin. Don't forget to pay attention to nails and cuticles. There are special creams designed to moisturise cuticles but I find olive oil is a good alternative.


Hard skin
Hard skin
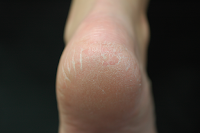
Hard skin - Have you ever stood on an escalator and at eye level in front of you, there is someone wearing flip-flops with rough looking, flakey heels? Don't let that flakey footed person be you! Keep hard skin on your feet at bay by regularly using a pumice stone or foot file after a bath or shower. I use a 'Ped Egg' foot file and I find that works pretty well. Whatever you do, do not use a razor to shave dead skin off your feet - I actually knew someone who once did this! It ended badly.


Nail length - Long nails look nice but keep your nails to a practical length according to your work and lifestyle. In my previous job, I frequently used my hands for some pretty rough work. Whenever I tried to grow my nails, I ended up snapping them. Painful and not very nice to look at! I try and grow my nails longer sometimes but I think the habit of having short nails is pretty well ingrained in me now.

Never pick at your polish - Whether you have had a DIY home manicure or a professional gel application, do not pick at your nail colour as it will damage the surface of the nail underneath. This is especially true for gel manicures. If you pick at or peel one of these, it can come off in one big, nail sized sheet. It might be fun but it'll damage your nail and expose the horror that lies beneath (a scaly, rough looking nail!)

Painting your own nails - Use a base coat underneath your nail colour to prevent staining your nail when you come to remove the colour. If you do have old polish stains on your nails, you can use cotton wool dipped in lemon juice to remove them. When you have finished applying your polish, apply a good quality, clear top coat to help prevent chipping and for extra shine. When it is time to remove your polish, use an acetone free remover, it is less harsh on your nails.


Protect your hands
Protect your hands - Washing up water, cleaning products and other nasties will all take their toll on your hands and nails. They may not be the most attractive garment but get those rubber gloves on!


This article has some really basic tips and advice. Some of you will know a lot of it already but hopefully there are some of you out there that have learnt a thing or two.

If you have enjoyed this article, check out more of my work at https://lulabellesomers.com/


Natural & Mineral Cosmetics: Is Organic Better?

Are you wondering what's the difference between organic mineral cosmetics and standard cosmetic products? The truth is that no one was giving this much thought until a company called Bare Escentuals began a massive advertising campaign to market their organic mineral cosmetic products. They started a worldwide revolution promoting mineral-based makeup, even demonstrating their products on television shows like QVC. Today, most people in the beauty industry have heard about the benefits of organic mineral cosmetics and makeup.


Mineral Cosmetics

Mineral cosmetics contain no oil, which is favourable to those with acne-prone skin. Unlike with wearing standard makeup products, acne will not get worse when you apply mineral-based makeup products. Additionally, research shows people who have rosacea, blackheads and pimples, when switched to using mineral cosmetics slowed down the skin problems progression. Standard makeup and cosmetics tend to trigger adverse reactions when applied to sensitive skin, while mineral cosmetics do not. People who previously could not wear makeup can now safely blend mineral-based cosmetic products without worrying about unsightly skin reactions and irritations.

Mineral cosmetics manufacturers exclude toxic ingredients also present in their competitors' standard beauty products. These additives include perfumes, parabens, oils, and artificial colouring. Dermatologists and other skin experts acknowledged for decades that the said ingredients are proven toxic to the epidermis. Given this statement, many people get an unpleasant skin reaction from wearing low-quality synthetic makeups. With the toxins removed and soothing effects on the skin, organic mineral cosmetic and makeup products, no doubt became a silver lining for health conscious cosmetics user and enthusiast.

Organic Makeup

Most organic makeup is 100% natural. Organic makeup manufacturers usually ensure that their makeup contains none of the artificial preservatives like Sodium Lauryl Sulfate and are oil-free, unlike what are available in lower-class cosmetic brands. Organic makeup does not contain Petrochemicals, glutens, GMOs or other harsh chemicals. Furthermore, a good news must spill to the public is that during the production of organic makeups, no cruel animals test occurs.

Organic makeup also contains many healthy ingredients like amino acids, vitamins E, C, and A, which are highly valuable in maintaining and promoting healthy skin. These vitamins hydrate the epidermis, offer nourishment to supporting tissues and combat the effects of skin damage-causing sun's UV rays. The beneficial ingredients contained in organic makeup will naturally brighten your skin tones so that it appears shimmering and more youthful.

Mineral-based Makeup

In conclusion, mineral-based makeup products nurture the healthy skin with specially blended formulas containing proteins, antioxidants and vitamins. These work synergistically together to replenish, moisturise and energise the skin. Mineral makeup is naturally lightweight and will never give you that heavy look of caked-on makeup.

Organic cosmetics and makeup work smoothly and flawlessly on the skin, as opposed to the 'full-makeup' look that many regular cosmetics pull off. It enhances your natural looks, giving your skin that vibrant and youthful glow.

For more makeup and cosmetic tips from Adorn Cosmetics, you are invited to check out the website at https://www.adorncosmetics.com.au


23 Quick Tips to Keep Coloured Hair Looking Extraordinary

Almost everyone in their lifetime has coloured their hair that has faded away much faster. Most of the time we wish the colour stayed as long and as fabulous looking as it could. With a little extra care and creativity, you can protect your hair colour and keep your hair looking as it was coloured yesterday. These 23 quick tips might just save your day (and colour!)


1.The foremost thing to consider when deciding to colour your hair, is the quality of colour to be used. Ask your stylist to use only the best quality colours that conditions too. While it may cost you an extra dime, it is going to be worth every penny once you are done colouring and you see it staying for long and nice. Professional hair colours that have superior conditioning properties than those sold loosely in retail are the best option to go for. Another great option is ammonia-free colours that are all the rage now.

2.The staying power of colour depends the choice of colour. You may not know but red colour family is the first to fade away. Colours like red, mahogany, burgundy and all others from the same family bleed faster than any other colour family. Their large molecular size is to be blamed which makes them more difficult to penetrate into the hair shaft, thus making them more susceptible to fading. Be sure to use a high-definition red hue that lends minimum stress to the hair cuticle.

3.Too much of shampooing can be ruining your coloured hair. While ammonia-free colours are demi-permanent as they have a 20-28 shampoo resistant time frame, permanent hair colours too can fade off too quickly with regular washing. Wash your hair less often to retain the natural oil of the scalp that conditions your coloured hair naturally. This will help keep the vibrant colour.

4.Do not shampoo your hair immediately after shampooing. In fact, hair companies and stylists suggest just conditioning the hair with a good mask after washing off the applied colour. This helps to lock in the colour.

5.Wait for at least two days after you have coloured your hair. This will give the colour ample time to set in the hair and less likely to be washed off faster.

6.The days when you are not shampooing, try to keep your hair dry in the shower by either tying it up or wearing a shower cap. Protecting it to get wet can save it from fading faster.


7.When shampooing colour-treated hair, wash it under tepid or cold water. Never wash hair with hot water, even in winters. This might take a toll on your hair quality and make the colour fade faster.


8.Every time that you shampoo your hair, be sure to condition it as well. Go for hair spas or heavy hair masks once in a week to lock in the moisture and make your colour-treated hair appear shinier and healthier.

9.The kind of shampoo and conditioner you use on your hair decides in how you hair is going to look. Go for professional shampoo and conditioners that are high in conditioning qualities. Salon grade products protect and condition your hair, thus minimizing the damage of colour on your hair.


10.Special colour-protecting shampoos are available for colour-treated hair. Use them whenever you shampoo your hair. Try the conditioner from the same range. This will make your colour last longer.

11.Look for sulphate-free shampoos. Sulphates tend to wash off colour faster, thus making hair look lifeless and dry. Sulphate free shampoos are much safer option.


12.Clarifying shampoos are good only before colouring. Use them to remove any traces of dirt, dust and chemicals such as hairsprays, resins and wax. Using it after colouring your hair might make it strip away hair colour due to high concentration of detergent in them.

13.Use leave in conditioners for that added care and softness to the hair. Leave-in conditioners are a great way to protect coloured hair from heat styling products, dirt and dust. Its special formulation locks in the moisture and leaves it tangle free and soft for hours.


14.Go for deep conditioning treatment at least once in 15-25 days if you have coloured hair. These treatments give a boost to the colour and make it look fresher. You can either opt for it at a salon or do it yourself at home. Apply a deep conditioning treatment cream onto the hair from roots to tips and wrap your hair up in a soft warm towel. After 30mins, wash off to get shinier healthy looking hair.

15.A hot oil treatment definitely has its benefits. Go for an oil rich in minerals such as coconut and castor oil mix. Apply it on hair that has been freshly shampooed and cleaned. Apply heat by either a hot towel or a steamer. Wash off after 30mins with cold water.


16.Heat protecting products are a great way to protect coloured hair from heat tools. Spray a good amount of heat protectant spray or mousse on to the hair before using blow dryer or straightener. This will save the hair from going extremely dry and unmanageable. Finish with a protective hairspray.

17.The importance of a healthy diet in great looking hair cannot be denied. What you eat will reflect on your skin and hair. Foods rich in iron, fibre and vitamins will add lustre and growth to your hair. Protein rich food helps the keratin in the hair and improves texture. Consume protein rich food such as fish, meat, cheese, egg whites and soy to enjoy gorgeous looking hair.


18.Supplements are a great way to boost your hair growth and look. If you are not getting enough nutrients from your diet, try taking iron and vitamin supplements such as Vitamin A, B-complex and Vitamin C. Biotin, an essential Vitamin B, is said to strengthen weak hair and support growth. It is found in salmon, egg yolks, sardines and carrots. If your diet is lacking in these, take supplements to keep your hair healthier and shinier.

19.Avoid chlorine, mostly found in swimming pools for colour treated hair. Chemicals in chlorine may react with hair colour and cause it to change in hue. Always apply a protective leave-in conditioner before entering the pol. This will help the colour to lock in and prevent chlorine from stripping away the colour and softness.


20.If you are out in the sun frequently, use a UV protection to protect your hair colour from harmful rays of the sun. Leave in sprays, styling products and hairsprays have SPF in them. Invest in some good ones and use them before going out in the sun to prevent damage. Wear a hat or a cap if you are going to be out for long.

21.Try not to colour your hair too frequently. Too much of colouring can strip your hair of its natural oils and make them look dry and frizzy. Colouring your greys once in 5-6 weeks is good enough. Invest in touch-up kits, spray on concealers or hair mascaras to tackle untimely greys instead of colouring your whole hair for 2-3 grey hairs.


22.Remember never to over process your hair with colour. Stick to the time mentioned in the colouring kit if you are doing it at home. Chemicals in the colour will damage your hair if kept for too long. Again, avoid colouring your hair immediately after any chemical treatment such as straightening or perming. If you want to do both, ask for ammonia free colours that condition while colouring.

23.Go for regular trims to save yourself from dry locks and split ends. Colouring does make the hair dry and damaged. Regular trims every few months will save you from frayed ends.


These simple tips have let you have coloured shinier and healthier looking hair in no time. Always use imported shampoo and conditioner to protect your colored hair.

Ombre Hair Tips You Should Consider

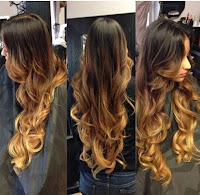
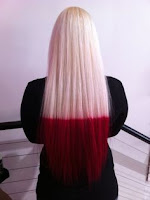
Ombre hair is the hair coloring effect that has the bottom hair portion looking lighter than top portion. The effect is achieved by bleaching lower hair portions and the ombre can be evened out using dye on the bottom part after the bleaching. The hair is trendy and very stylish and many ladies have taken it up as the best dyeing technique. But just like any other hairstyle, there are things you must consider and remember if at all you are to get the best results with your ombre hair.


Ombre Hair Tips
1. Keep the hair as healthy as possible.  Bleaching basically removes pigment from hair to lighten it and it can be damaging compared to dyeing. Also important to remember is that the technique concentrates on hair ends and lengths which are compromised and can sustain damages compared to newer growths near the roots. To keep damages minimal consider trimming hair before and after ombre especially for dry or long hair. It is a simple way of preventing split ends or making them worse. You should nourish and soften hair once a week using color safe deep conditioner.


Ombre Hair Tips
2. Remember that tone is everything.
A brassy tint can be a big mistake with the ombre coloring. It is usually a result of bleach on hair that is dark with reddish undertones. Colorists avoid this effect by following the highlights with corrective toner. If you are coloring yourself, then consider adding achy or cool color depositing hair toner to remove yellow and orange tones.


Ombre Hair Tips
3. Go easy with the colors. 
When going ombre, it is best that you stick to natural hair colors, however adventurous you might be feeling. For black hair or dark brown hair, the ombre should not be lighter than soft medium or light brown. Light brown hair and blonde hair can have lighter color towards hair ends. To get it right, remember that the lighter the hair the lighter the ombre can go. Avoid being too drastic with your color choices if you want a good finish.


Ombre Hair Tips
4. Try as much as possible to avoid harsh lines.
Demarcation lines that are too harsh do not look any good. The hair should not go from light to dark too instantly and should instead appear sun-kissed and natural. The hand painting technique can be best to evenly distribute and blend lighter pieces. Mussing up hair strands also achieves the same positive results with the ombre. If you are doing the coloring yourself, consider using a toothbrush after applying bleach to rub color upwards to achieve the subtle gradient effect.


Ombre Hair Tips
5. Get a reliable stylist. 
To avoid a messy ombre, trust a skilled stylist. So much can go wrong when coloring the hair, especially with dark hair you want to dramatically lighten. A stylist will choose the most flattering highlights to match your hair type and facial features. You also do not have to worry about poor product choices when you hire the services of skilled hair colorists to do your ombre.


Short hair ombre is popular with women today because it keeps natural looks and is easy to wear and maintain. Find beautiful short ombre ideas by visiting http://hairstylezz.com/best-hair-short-ombre/ and choose the best for you.

6 Useful Diet Tips That Can Safeguard Your Health

Your health is something that can be deteriorated easily if you don't pay enough attention. Your regular diet can determine your overall health in the long run. It is important to pay due attention to your diet so that your health can be safeguarded. Thus we have listed and explained a few important diet tips that can take you a long way forward.


1. Fruits and vegetables


Fruits and vegetables
Fruits and vegetables should not be consumed on a seldom basis. It should be part of your everyday diet because of the health benefits associated with them. You need to choose a variety of these items because of the different combinations of minerals and vitamins that they contain.


2. Fish


Fish
You need to aim for at least two portions of fish per week. If one of these fish is oily, you will benefit more. An oily fish is said to be a very rich of vitamin D. it is also important for the health of your bones. These include fresh tuna, salmon, trout and mackerel.


3. Cut down saturated sugar and fat


Cut down saturated sugar and fat
We obviously need some sugar and fat in our diet. However too much of these can complicate our health condition. There can be an increase in the risk of tooth decay when it comes to regular consumption of sugar. Too much of sugar has never done at good to any person in this world.


4. Consume less of salt


Consume less of salt
High amount of salt intake is associated with a very increased risk of development of high blood pressure which can put you at a much greater risk of developing heart disease and stroke. This intake is mostly from processed foods and not on salt that is added while cooking.


5. Water, never get thirsty


Water, never get thirsty
Save yourself from the thirst. Consume equal amounts of water at regular intervals in order to avoid thirst throughout the day. You need to aim for at least 8 glasses in a day. Water is an essential for all of us and there is no reason for us to avoid it.


6. Breakfast- the most important meal of the day


Breakfast- the most important meal of the day
Skipping breakfast can do you a lot of harm in the long run. It can improve your appetite and keep you healthy. If you skip breakfast, the other healthy activities you follow the rest of the day will not be very useful. You will also not be any productive and efficient. It is one of the important things to remember.